Day 24
Again, I've been busy for last 5 days shooting and working on images. That's a good thing! This time I did a food shoot for the Korean restaurant. Several different dishes but the lighting set up was pretty much the same. This time I played around with the stamp tool. The way Apple approached this is quite clever. Instead of having to save settings in every adjustment you make and then apply each and every saved setting to your image, all you need to do is make all your adjustments on one image and then click on the lift tool (which takes all your settings and opens up s HUD). Now here is the cool part. You can select and apply (stamp) only the setting you want by clicking the the check boxes on and off. You can apply the chosen setting to one image at a time or to as many images as you select. This may not seem like a big deal, but it probably saved me about half an hour of sitting in from in front of the computer. That's an extra half hour I can do something else like shooting or maybe skiing, or mountain biking. I'm off now to figure out what I'm going to do with that extra half hour... I just hope it doesn't take me half an hour to figure out what I'm going to do ;o)
March 28, 2008
30 Days Using Aperture 2 (Day 24)
Aperture 2.1 Released
Today Apple announced Aperture 2.1 that allows third party plug-ins. You might never have to leave Aperture at all to do your basic image editing.
Read the press release here.
March 23, 2008
30 Days Using Aperture 2 (Day 19)
Day 19
I've been quite busy over the last 5 days and today I finally had the chance to sit in front of the computer and use Aperture 2.
I was originally confused with the 3 sharpening options available in Aperture 2. The very first one is under the RAW fine tuning heading in the adjustments tab. This one is what Aperture thinks should be applied to all images being converted from RAW files for your particular camera... OK That gets turned off right away! I prefer to make my own decisions regarding my images.
The second one is under the Sharpen heading. This one is a remnant of Aperture 1. Edge sharpening was introduced in Aperture 1.5 and is supposed to be the way to go. Lets see.
I found this article on Apple's website that explains edge sharpening. The image below was converted into B&W and edge sharpening was applied (settings = Intensity - .76, Edges - .31, Falloff - .77). The sharpening was enough for me to actually see, but seems to keep any sharpening artifacts to a minimum.

March 17, 2008
30 Days Using Aperture 2 (Days 13-14)
Days 13-14
Two hours!!!! That's all it took to go through 70+ images and edit them down to 11 final images and crop, adjust and burn a CD (TIFF & JPEG) for the client. Within those two hours I also had a bite to eat, took a phone call and chatted with a friend on MSN. I can honestly say with more practice using Aperture 2 I could easily do all that in under an hour. That's fast!
Yesterday I was preparing for a photo shoot that night for a local restaurant and making a beauty dish to fit on my flash that I could use for that shoot. Today, I imported the images on to my computer's hard drive and then I proceeded to import those images into Aperture 2 (stored on an external hard drive). I started rating the images (1 - 5 stars) by hitting the corresponding numbers on my keyboard while I viewed each image full screen. I would hit the right or left arrow key to move from image to image. I then selected only 3 star or higher images.This gave me my final 11 images (I'm pretty tough on rating my images). The cropping and final adjustments were made on those images and then I exported a TIFF and a JPEG of each image to a CD. Hit burn CD and I was done. Not bad considering my total noobness with Aperture 2.

Beauty Dish Update

March 16, 2008
Make Your Own Beauty Dish
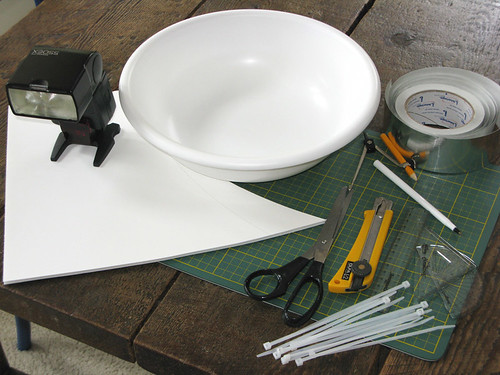
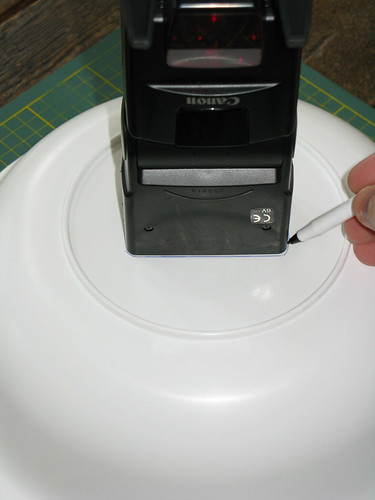
Trace around the front of your flash. Make sure it is centered on the bottom of the bowl.
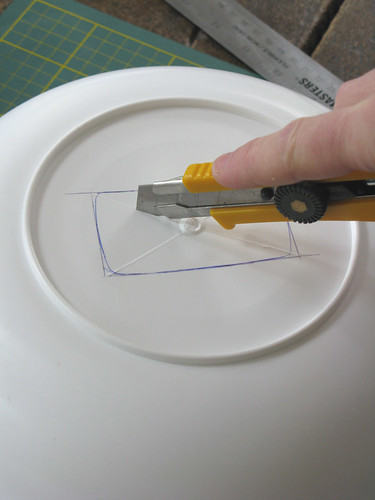
Make 2 diagonal cuts to make the flaps
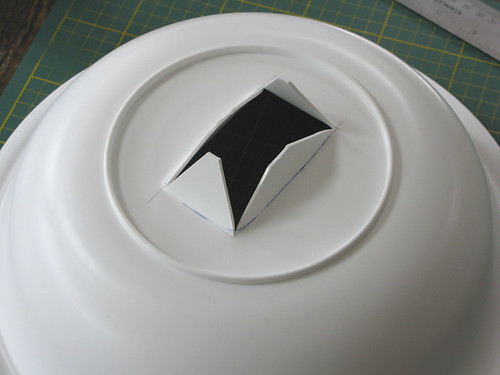
Fold the flaps back 90º.
(Trick - once the flaps are cut, fill your sink with hot water from the tap, let the bottom of the bowl sit in the hot water for about 5 min. to heat up the plastic making it easier to fold back)
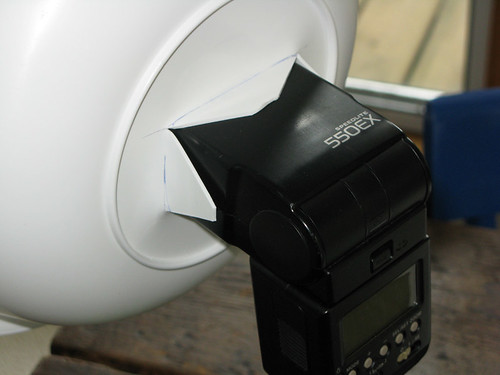
Check to see how your flash fits.
Front view of fit.
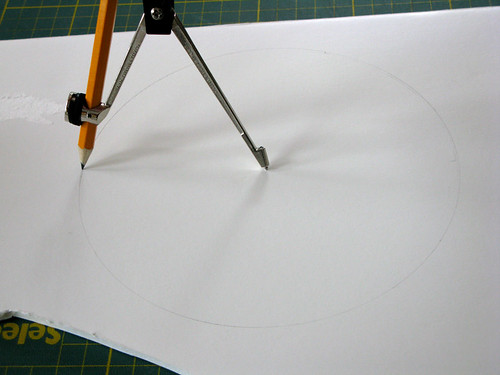
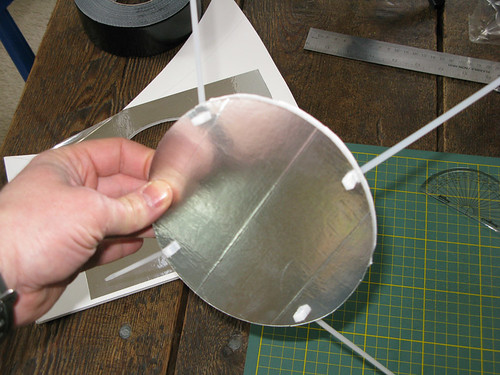
Draw circle on foam board, about 1/2 the diameter of the bowl.

Apply aluminum tape on other side of foam board, making sure the aluminum tape covers a larger area than the circle on the other side.

Cut out circle with sharp box cutter knife.
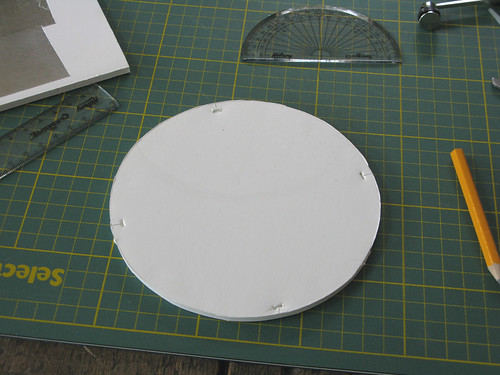
Cut slits just big enough for the zip-ties to fit through every 90º.
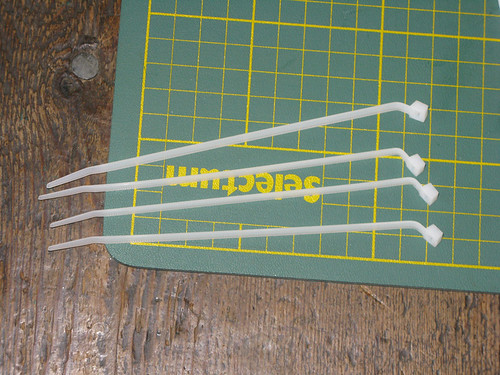
Bend the zip-ties (you'll see why)
Insert zip-ties through the holes you cut into the circle so the bends in the zip-ties face outward (radiating from the circle)

Front view
Cut slits into the plastic bowl just big enough for the zip ties to fit through every 90º
(Trick - you might have to insert a small flathead screwdriver into the slits to stretch them just enough to get the zip-ties through, the zip-ties should be held in place by the friction from the slits)
DO NOT MAKE THE SLITS TOO BIG SO THE ZIP-TIES MOVE FREELY!

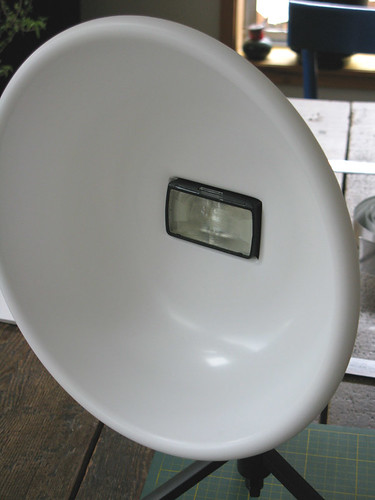
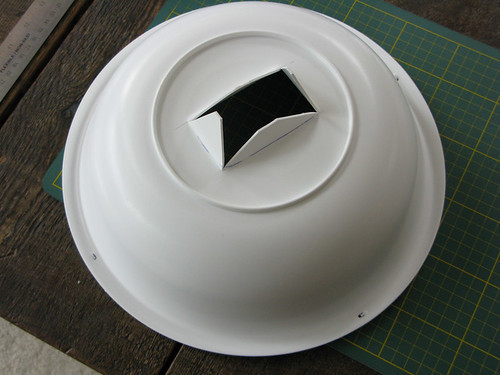
This is how it looks finished.
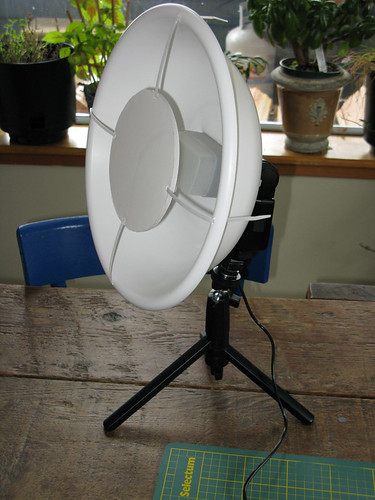
With an omni-bounce on the flash.
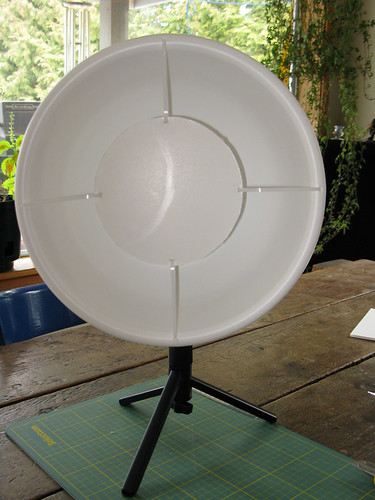
Front view.
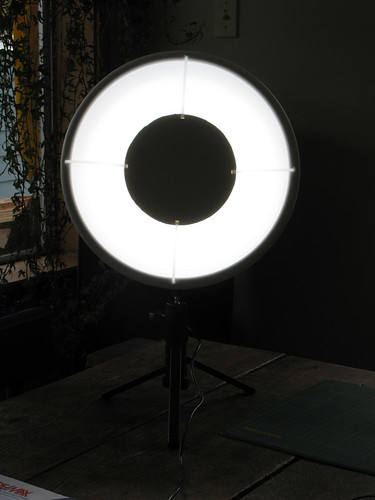
Illuminated (with omni-bounce on flash).

I might not be beautiful, but the light from the beauty dish looks good!
March 15, 2008
30 Days Using Aperture 2 (Days 10-12)
Days 10-12
I started looking for more detailed information for working with Aperture 2. The tutorials were just not cutting it. It seems when you buy Aperture 2 you get a booklet "Exploring Aperture 2" and sample projects to play with. With the 30 day demo you do not. I did find the the PDF file of "Exploring Aperture 2" here. It is a life saver.
I am now starting to understand the different view modes and the HUD's (Heads Up Displays). My favorite is hitting the "F" key for full screen display and then the "H" key to get the inspector HUD on screen. This gives you just the image you are working on and the inspector HUD that you can move to anywhere on your screen and size it to a good working size. If you move your mouse to the bottom of the screen your browser of your images comes up so you can change the image you are working on. You can also move your mouse to the top of the screen and the toolbar will drop down. By clicking the toggle switch on the right of the toolbar you can set it to stay in place or leave it so it will automatically hide when you move your mouse away from the top of the screen.
I just started using the "Stacks" feature. I like the idea of being able to stack similar images together by selecting the group of images by shift clicking on them and then clicking on Stacks > Stack. You can also Auto Stack images that have been shot in sequence. By clicking Stacks > Auto Stack you will get a HUD that will allow you to select a time interval between images up to 1 min. Once your images are stacked a number will appear on the main image, by clicking on that number you can open and close the stack to view all or just the main image.
More to come soon.


